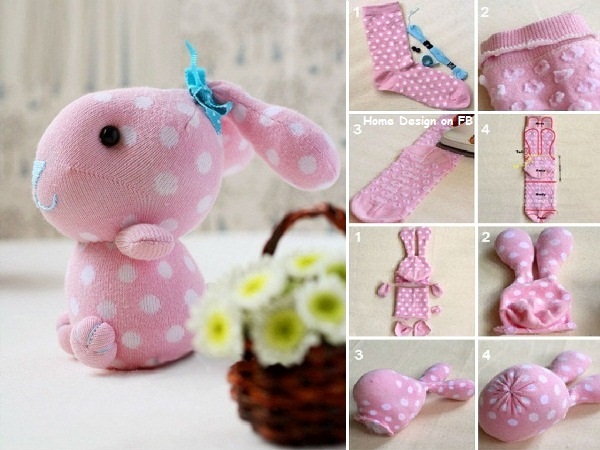
This next tutorial is going to show you how to sew cute little rabbits out of socks, for your children to play with. It is a nice and funny DIY project and you will learn to make a pretty bunny which can also be a great gift idea. You’ll need to prepare the following materials: socks (white, pink or gray), colored thread, two round seeds beads or buttons for the rabbit’s eyes, a ribbon, cotton for stuffing, scissors, needles, pens and an iron.
So here are the steps you will have to follow.
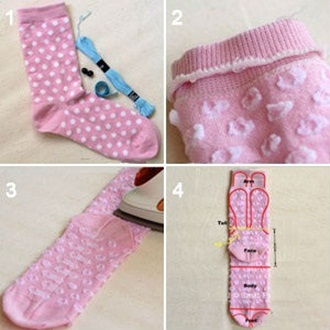
Flip the left socks, all smoothed into long tubes. On each part, draw the rabbit: the heel part will be used for the rabbit’s ears. Paint then two small rectangular pieces on the ears and draw on the curved edges to create a rabbit paw. Then, draw the nose and the other two legs just like in the picture. Use pins to hold the fabric, when cutting out the figure.
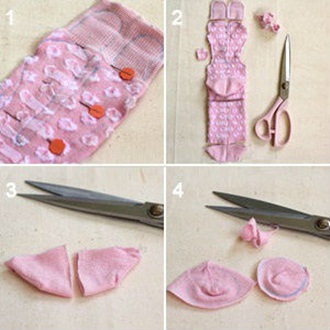
Stitch the two layers to assemble them into a tiny tube-shaped handmade rabbit, do the same with the remaining paws. Sew together the two layers, stuff them with cotton and flip the fabric and sew around the neck. Then sew the rabbit’s ears, which have to be long and thin, just like the real ones.

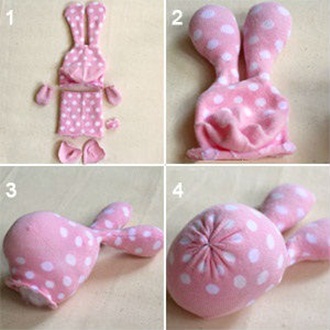
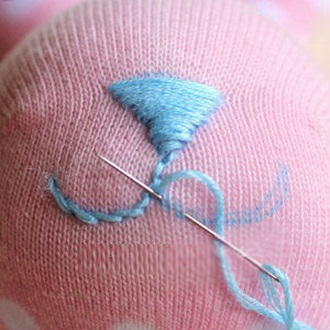
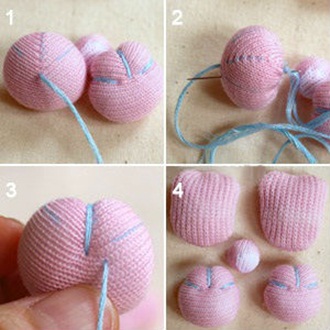
At the center of the rabbit’s figure, draw a small triangle for the nose, then draw two arched shapes to make the face of the rabbit. It will look cute, as it is smiling. Now take the colored thread and start sewing the nose and the mouth of the rabbit so it will be visible.
After that, make the eyes of your rabbit by drawing a diagonal triangle on the top of the head.
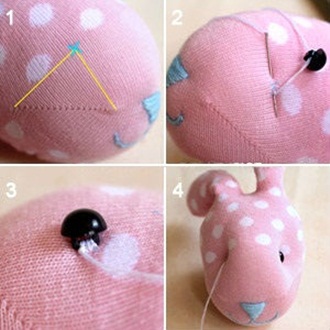
Sew the rounded beads on each part of the head of the puppet to make the eyes of your doll.
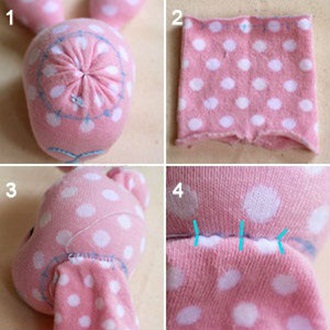
Now you can start sewing together the body, just like you did with the head of the puppet. After that you will need to assemble the rabbit doll. Sew together the head with the body. Do not forget to stuff the doll with cotton fabric, otherwise it won’t look good.
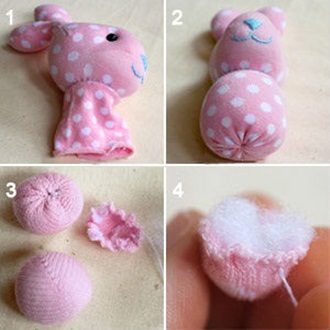
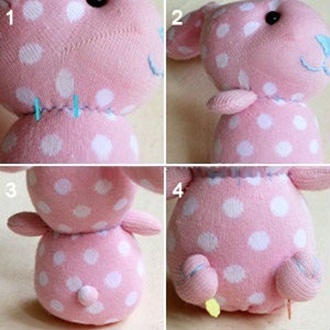
Cut out the paws, into circular forms and sew them. Stuff these two and they will look like cotton balls. Attach them too to the doll. Do the same for all the paws.

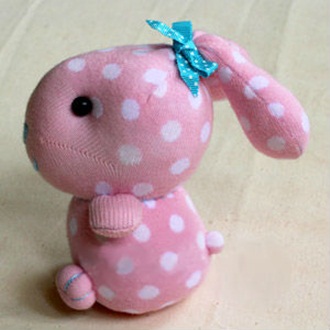
When your doll is ready, just attach a cute little ribbon to one of its ears and your puppet is ready.
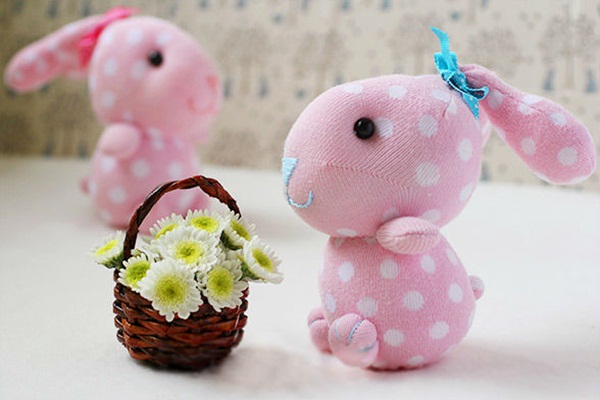
Isn’t it cute? We are sure your children will love it and if they are a bit bigger and know how to use needles and pins, you can make this project together with them, step by step.
taken from http://goodshomedesign.com/diy-sock-bunny/ >>thanks...


0 comments:
Post a Comment